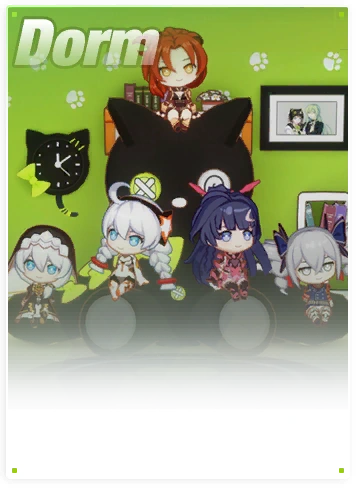
The Dormitory is a feature in Honkai Impact 3rd that allows Captains to interact with chibi versions of their favorite Valkyries or Stigmata. The Dorms can be customized with a large array of furniture and even allows for additional rooms and change of setting. Relax with your favorite characters in Honkai Impact 3rd!
Welcome to St. Freya's Dormitory[ | ]
Dorm Info[ | ]
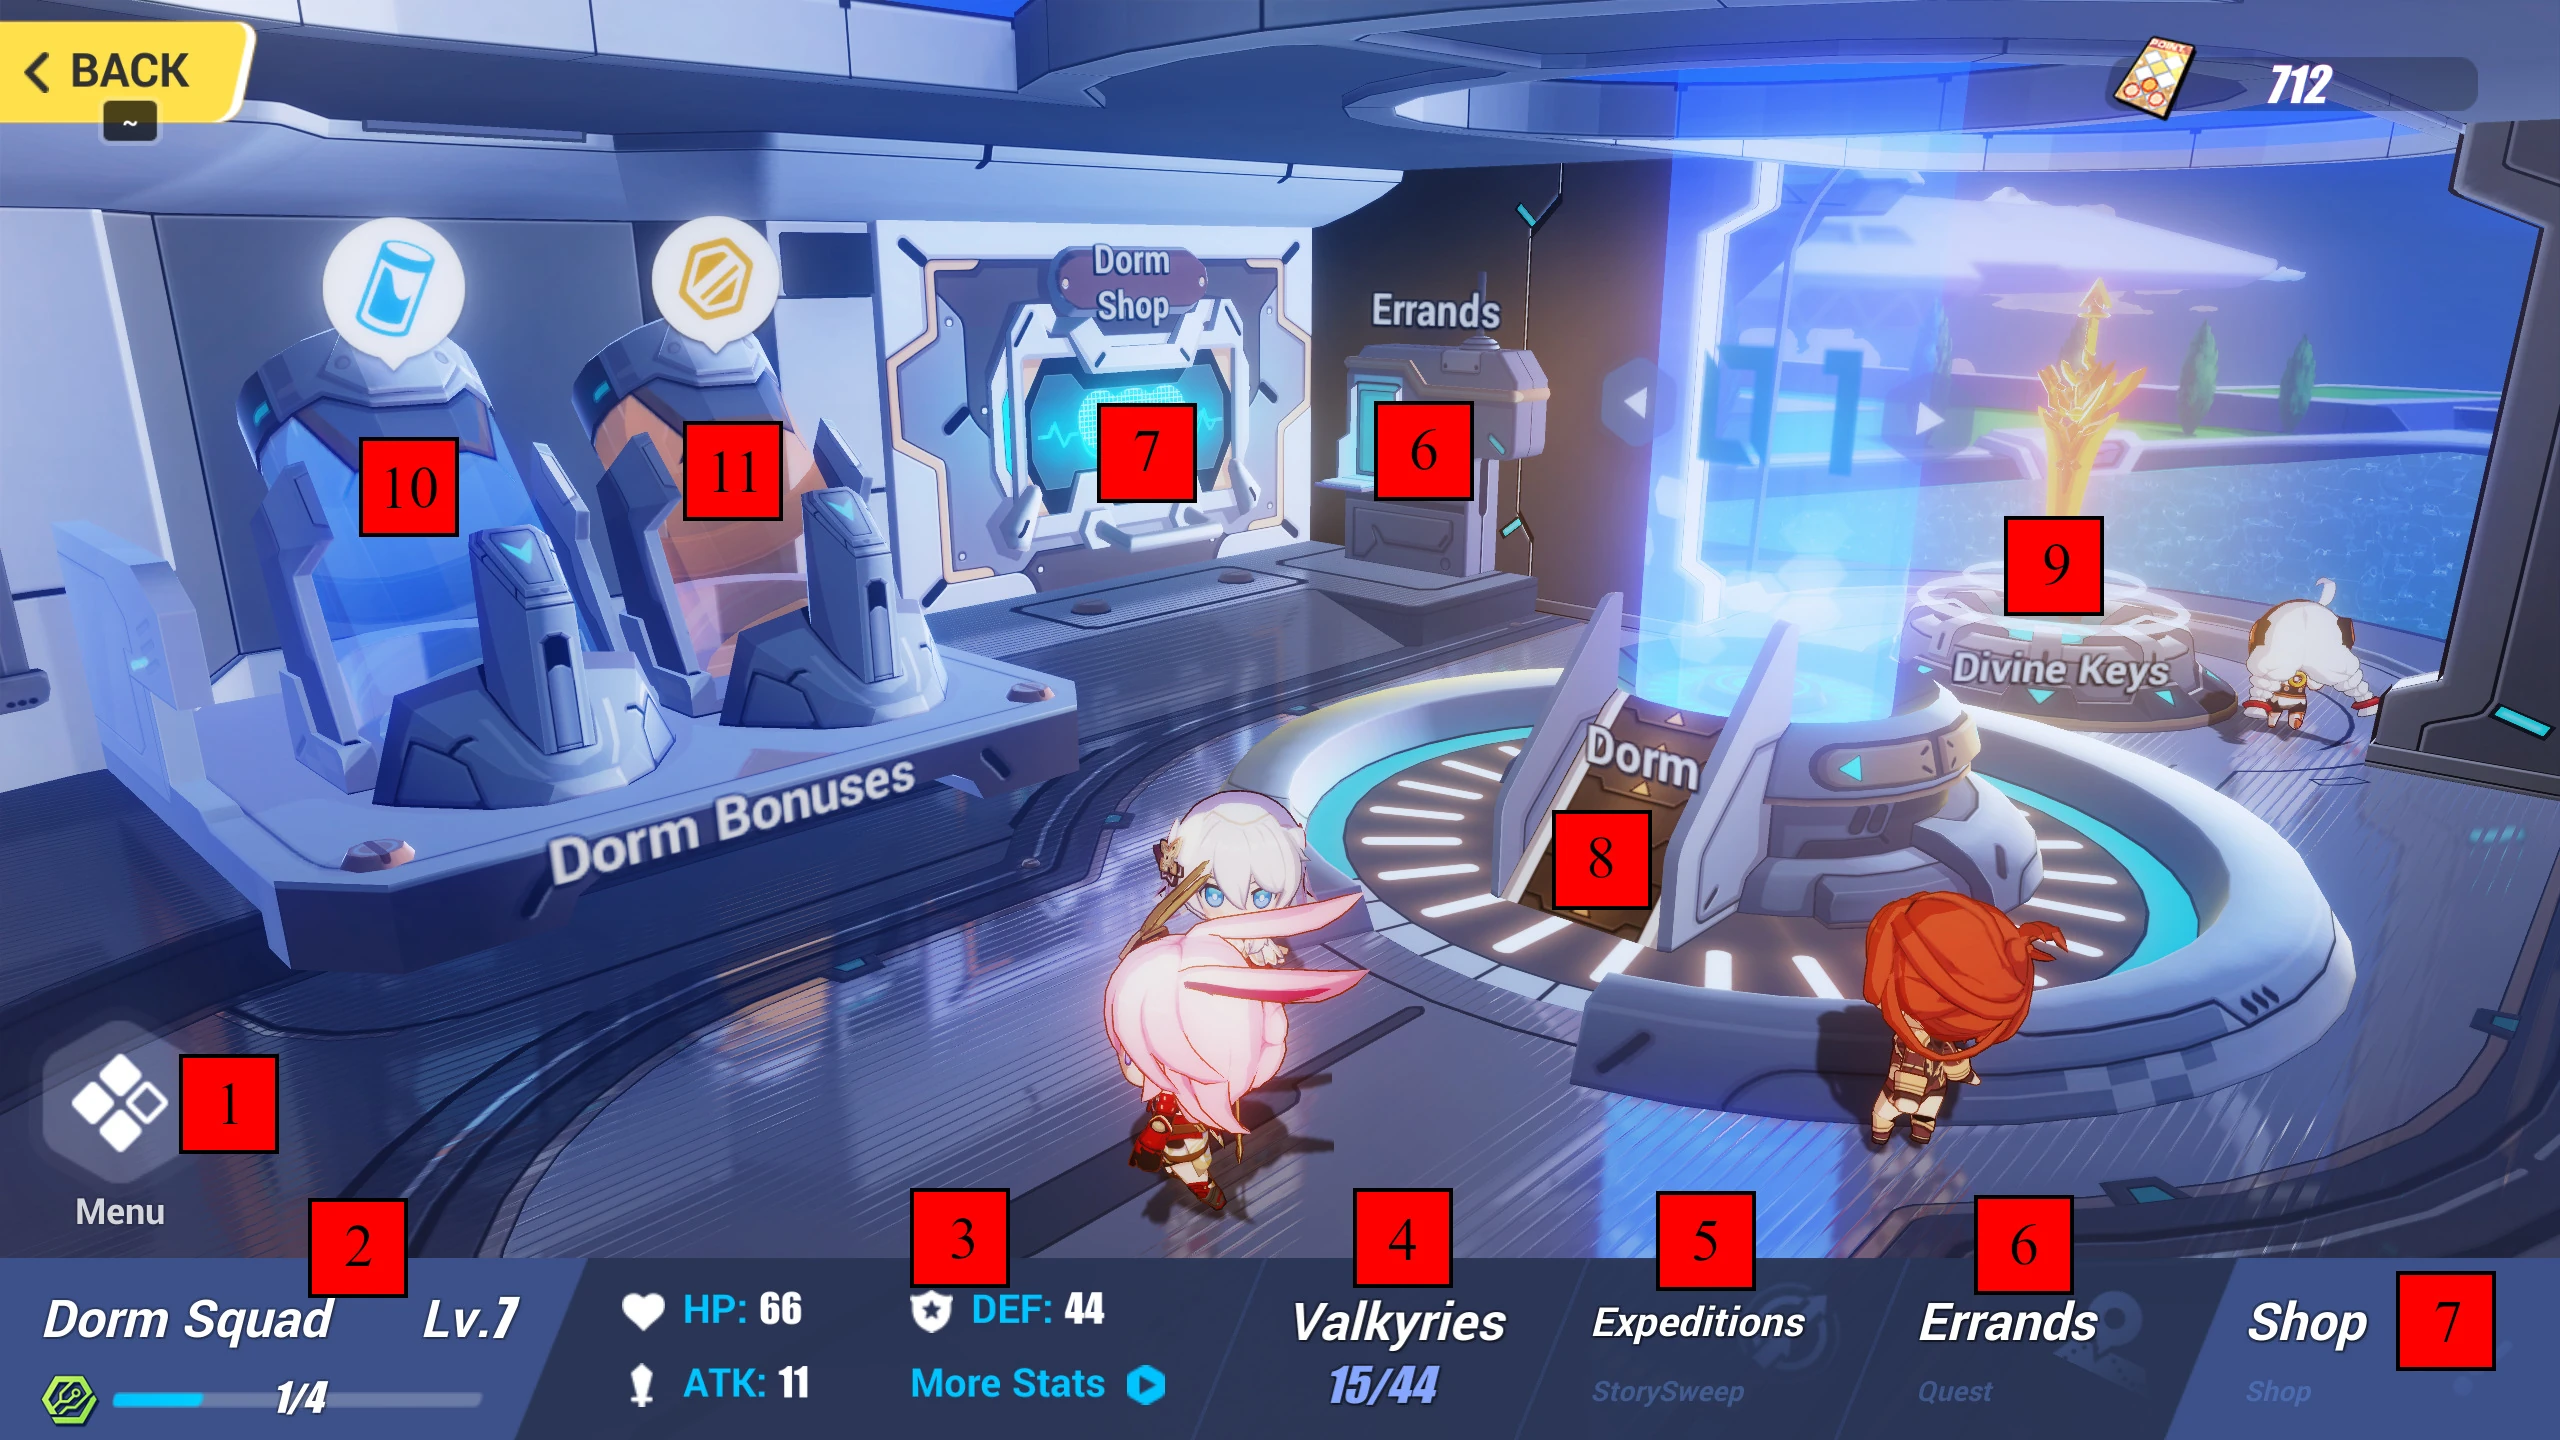
List of menu elements:
1. dropdown menu for chibi list, Dorm Supply and help, 2. #Dorm Squad Level, 3. stat boost summary, 4. list of valkyries for increasing Dorm Squad Level, 5. automatic Expeditions, 6. #Errands, 7. Dorm Shop, 8. Dorm, 9. Divine Keys menu, 10. Stamina Depot, 11. #Refinery.
Dorm Squad[ | ]
- Raise your Valkyries to gain Squad EXP to level up your Dorm Squad.
- Increasing your Dorm Squad Level improves your Dorm Stat Bonuses and Dorm Functions.
Introduced with Dorm Squad United.
Dorm Squad Bonus[ | ]
- Your Stats Bonus has two parts: Basic Attributes and Special Skills, and they both apply to all your Valkyries.
- Basic Attributes improve as Dorm Squad levels up.
- Special skills only unlock upon acquiring certain battlesuits, and enhance as the battlesuits evolve.
Dorm Valkyrie Special Skills[ | ]
Fire Damage Dealt (+5% at S, +7% at SS)
Lightning Damage Dealt (5%/7%)
Ice Damage Dealt (5%/7%)
Physical Damage Dealt (3%/4%)
Total Damage Dealt (2%/3%)
Elemental Damage Taken (-5%/-7%)
Dorm Functions[ | ]
- Expedition Stamina: More available Expedition Stamina.
- Dorm Shop: New items will unlock as your Dorm levels up.
- Worker Level: Daily list of available errands expands as Worker Level raises.
- Refinery: Coin production rate, storage volume and Crit Rate increase as the Refinery levels up.
- Stamina Depot: Stores Excess Stamina.
Dorm Worker Level[ | ]
The Dorm Worker Level controls onigiri capacity and regen rate, how many errands are available, and the required "quality" of the valkyries assigned to errands.
| Worker Lv. | Squad Lv. | S+ | S | A | B | C |
|---|---|---|---|---|---|---|
| I | 1 | 2/2(2) : 20c | 2/1(2): 62 | 1/1(2) : 34 | 1(1) : 22 | 1(1) : 15 |
| II | 6 | 5/3(3) : 25c | 5/2(3) : 76 | 4/2(3) : 43 | 2/1(2) : 27 | 1/1(2) : 18 |
| III | 11 | 8/6(3) : 30c | 6/3(3) : 92 | 5/3(3) : 53 | 4/2(3) : 34 | 2/1(2) : 22 |
| IV | 16 | 12/8(3) : 30c | 8/8(3) : 97 | 7/3(3) : 56 | 5/3(3) : 36 | 4/2(3) : 23 |
| V | 21 | 16/10(4) : 35c | 12/8(3) : 115 | 8/4(3) : 67 | 7/3(3) : 44 | 5/2(3) : 29 |
| VI | 26 | 18/12(4) : 35c | 16/13(4) : 119 | 8/6(3) : 69 | 8/4(3) : 45 | 7/3(3) : 30 |
| VII | 31 | 18/14(4) : 40c | 16/14(4) : 131 | 12/8(4) : 77 | 8/6(3) : 50 | 8/4(3) : 33 |
| VIII | 36 | 20/18(4) : 40c | 18/16(4) : 147 | 14/12(4) : 92 | 12/8(3): 61 | 8/6(3) : 41 |
Errands[ | ]
- Deploy Valkyries to work at different places and get rewards.
- Meet the Quality requirements to be able to start working.
- Working costs Onigiri. The Onigiri regen rate it related to Dorm Squad Level and Dorm Comfort.
- Errand list refreshes at 04:00 daily. Unclaimed rewards can still be claimed after the refresh and will not affect the refresh.
Errands are the primary source of ![]() Work Points Cards.
Work Points Cards.
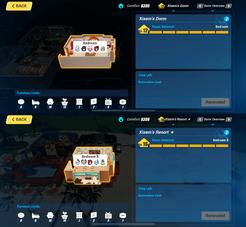
Dorm Renovation[ | ]
The Dorm Renovation and Comfort levels are the scores that allow Captains to expand their dorms. Renovating allows more pieces of furniture to be placed in each room, and in some cases even allows for more rooms to be built.
Dorm Renovation Levels[ | ]

Dorm 01 Renovation max 12 lvl, Dorm 02 – max 16 lvl
Use building materials to renovate your dorm. Each renovation will add 1 yellow bar of renovation progress towards your current renovation level.
Each renovation level requires 6 bars of renovation progress and is only applied to one room.
Completing renovation progress will increase the limit on the number of furniture displayed. A higher renovation level will also increase the number of Valkyries that can move in and will increase dorm energy.
Renovation of rooms in each of the dormitories increases the number of furniture of a certain type available for placement in it. Maximum renovation level:
- Dorm 01 – 12th level
- Dorm 02 – 16th level
Level 1[ | ]
| Renovation Progress | Result | Renovation Time | Renovation Cost | Required Comfort Level |
|---|---|---|---|---|
| P.0 -> P.1 Master Bedroom |
|
10m 00s |  ⨯7 |
|
| P.1 -> P.2 Master Bedroom |
|
10m 00s | ⨯7 |
|
| P.2 -> P.3 Master Bedroom |
|
10m 00s | ⨯7 |
|
| P.3 -> P.4 Master Bedroom |
|
10m 00s | ⨯8 |
|
| P.4 -> P.5 Master Bedroom |
|
10m 00s | ⨯8 |
|
| P.5 -> P.6 Master Bedroom |
|
10m 00s | ⨯12 |
Level 2[ | ]
| Renovation Progress | Result | Renovation Time | Renovation Cost | Required Comfort Level |
|---|---|---|---|---|
| P.0 -> P.1 Common Area |
|
20m 00s | ⨯9 |
|
| P.1 -> P.2 Common Area |
|
20m 00s | ⨯10 |
|
| P.2 -> P.3 Common Area |
|
20m 00s | ⨯11 |
|
| P.3 -> P.4 Common Area |
|
20m 00s | ⨯11 |
|
| P.4 -> P.5 Common Area |
|
20m 00s | ⨯12 |
|
| P.5 -> P.6 Common Area |
|
20m 00s | ⨯16 |
|
New Room Unlocked: Bedroom
|
Level 3[ | ]
| Renovation Progress | Result | Renovation Time | Renovation Cost | Required Comfort Level |
|---|---|---|---|---|
| P.0 -> P.1 Bedroom |
|
40m 00s | ⨯13 |
|
| P.1 -> P.2 Bedroom |
|
40m 00s | ⨯14 |
|
| P.2 -> P.3 Bedroom |
|
40m 00s | ⨯15 |
|
| P.3 -> P.4 Bedroom |
|
40m 00s | ⨯16 |
|
| P.4 -> P.5 Bedroom |
|
40m 00s | ⨯16 |
|
| P.5 -> P.6 Common Area |
|
40m 00s | ⨯22 |
Level 4[ | ]
| Renovation Progress | Result | Renovation Time | Renovation Cost | Required Comfort Level |
|---|---|---|---|---|
| P.0 -> P.1 Master Bedroom |
|
01h 00m | ⨯18 |
|
| P.1 -> P.2 Master Bedroom |
|
01h 00m | ⨯19 |
|
| P.2 -> P.3 Master Bedroom |
|
01h 00m | ⨯20 |
|
| P.3 -> P.4 Master Bedroom |
|
01h 00m | ⨯21 |
|
| P.4 -> P.5 Master Bedroom |
|
01h 00m | ⨯22 |
|
| P.5 -> P.6 Master Bedroom |
|
01h 00m | ⨯30 |
Level 5[ | ]
| Renovation Progress | Result | Renovation Time | Renovation Cost | Required Comfort Level |
|---|---|---|---|---|
| P.0 -> P.1 Common Area |
|
02h 00m | ⨯24 |
|
| P.1 -> P.2 Common Area |
|
02h 00m | ⨯25 |
|
| P.2 -> P.3 Common Area |
|
02h 00m | ⨯26 |
|
| P.3 -> P.4 Common Area |
|
02h 00m | ⨯28 |
|
| P.4 -> P.5 Common Area |
|
02h 00m | ⨯29 |
|
| P.5 -> P.6 Common Area |
|
02h 00m | ⨯39 |
Level 6[ | ]
| Renovation Progress | Result | Renovation Time | Renovation Cost | Required Comfort Level |
|---|---|---|---|---|
| P.0 -> P.1 Bedroom |
|
04h 00m | ⨯31 |
|
| P.1 -> P.2 Bedroom |
|
04h 00m | ⨯33 |
|
| P.2 -> P.3 Bedroom |
|
04h 00m | ⨯34 |
|
| P.3 -> P.4 Bedroom |
|
04h 00m | ⨯35 |
|
| P.4 -> P.5 Bedroom |
|
04h 00m | ⨯37 |
|
| P.5 -> P.6 Bedroom |
|
04h 00m | ⨯50 |
Level 7[ | ]
| Renovation Progress | Result | Renovation Time | Renovation Cost | Required Comfort Level |
|---|---|---|---|---|
| P.0 -> P.1 Master Bedroom |
|
08h 00m | ⨯40 |
|
| P.1 -> P.2 Master Bedroom |
|
08h 00m | ⨯41 |
|
| P.2 -> P.3 Master Bedroom |
|
08h 00m | ⨯43 |
|
| P.3 -> P.4 Master Bedroom |
|
08h 00m | ⨯44 |
|
| P.4 -> P.5 Master Bedroom |
|
08h 00m | ⨯46 |
|
| P.5 -> P.6 Master Bedroom |
|
08h 00m | ⨯62 |
Level 8[ | ]
| Renovation Progress | Result | Renovation Time | Renovation Cost | Required Comfort Level |
|---|---|---|---|---|
| P.0 -> P.1 Common Area |
|
12h 00m | ⨯49 |
|
| P.1 -> P.2 Common Area |
|
12h 00m | ⨯51 |
|
| P.2 -> P.3 Common Area |
|
12h 00m | ⨯53 |
|
| P.3 -> P.4 Common Area |
|
12h 00m | ⨯54 |
|
| P.4 -> P.5 Common Area |
|
12h 00m | ⨯56 |
|
| P.5 -> P.6 Common Area |
|
12h 00m | ⨯75 |
Level 9[ | ]
| Renovation Progress | Result | Renovation Time | Renovation Cost | Required Comfort Level |
|---|---|---|---|---|
| P.0 -> P.1 Bedroom |
|
14h 00m | ⨯60 |
|
| P.1 -> P.2 Bedroom |
|
14h 00m | ⨯62 |
|
| P.2 -> P.3 Bedroom |
|
14h 00m | ⨯64 |
|
| P.3 -> P.4 Bedroom |
|
14h 00m | ⨯66 |
|
| P.4 -> P.5 Bedroom |
|
14h 00m | ⨯68 |
|
| P.5 -> P.6 Bedroom |
|
14h 00m | ⨯91 |
Level 10[ | ]
| Renovation Progress | Result | Renovation Time | Renovation Cost | Required Comfort Level |
|---|---|---|---|---|
| P.0 -> P.1 Master Bedroom |
|
16h 00m | ⨯72 |
|
| P.1 -> P.2 Master Bedroom |
|
16h 00m | ⨯74 |
|
| P.2 -> P.3 Master Bedroom |
|
16h 00m | ⨯76 |
|
| P.3 -> P.4 Master Bedroom |
|
16h 00m | ⨯78 |
|
| P.4 -> P.5 Master Bedroom |
|
16h 00m | ⨯108 |
|
| P.5 -> P.6 ? |
|
? | ? | ? |
Level 11[ | ]
| Renovation Progress | Result | Renovation Time | Renovation Cost | Required Comfort Level |
|---|---|---|---|---|
| P.0 -> P.1 Commons |
|
18h 00m | ⨯85 |
|
| P.1 -> P.2 Commons |
|
18h 00m | ⨯88 |
|
| P.2 -> P.3 Commons |
|
18h 00m | ⨯90 |
|
| P.3 -> P.4 Commons |
|
18h 00m | ⨯93 |
|
| P.4 -> P.5 Commons |
|
18h 00m | ⨯95 |
|
| P.5 -> P.6 Commons |
|
18h 00m | ⨯127 |
Level 12[ | ]
| Renovation Progress | Result | Renovation Time | Renovation Cost | Required Comfort Level |
|---|---|---|---|---|
| P.0 -> P.1 Bedroom |
|
20h 00m | ⨯100 |
|
| P.1 -> P.2 Bedroom |
|
20h 00m | ⨯103 |
|
| P.2 -> P.3 Bedroom |
|
20h 00m | ⨯105 |
|
| P.3 -> P.4 Bedroom |
|
20h 00m | ⨯108 |
|
| P.4 -> P.5 Bedroom |
|
20h 00m | ⨯111 |
|
| P.5 -> P.6 Bedroom | 20h 00m | ⨯148 |
Dorm Comfort Level[ | ]
Displaying furniture in the dorm will increase the comfort level.
The dorm comfort level is the total comfort level of all dorm rooms (including the common area).
Once the dorm comfort level reaches a certain number, the comfort level rating will increase.
The comfort level rating affects the rate of regeneration of dorm energy. A higher rating will increase the rate of regeneration.
Comfort level rating will also be shown as a prefix before the Captain's dorm name.
Old Tiers:
| Level | Comfort Required | Energy Regen |
|---|---|---|
| 1-299 | +2/Hour | |
| 300-899 | +4/Hour | |
| 900-1499 | +8/Hour | |
| 1500-2399 | +12/Hour | |
| 2400-3499 | +17/Hour | |
| 3500 | +23/Hour |
Up-to-date Tiers:
| Level | Comfort Required | Total Onigiri Regen Boost |
|---|---|---|
| 1-299 | +0/Hour | |
| 300-799 | +0/Hour | |
| 800-1499 | +1/Hour | |
| 1500-2399 | +1/Hour | |
| 2400-3499 | +2/Hour | |
| 3500-4799 | +2/Hour | |
| 4800-6299 | +3/Hour | |
| 6300+ | +3/Hour |
Dormitory Facilities[ | ]
Dorm Facilities are different machines in the common area that allow you to perform various tasks to help in the main game. Stigmata and weapon upgrades are available, as well as Battlesuit level and SP training. You can even stockpile stamina to have ready later!
The energy center is unlocked by default, and upgrading it will unlock other facilies.
Dorm facilities have various functions, and using facilities will consume dorm energy.
Upgrading a dorm facility will improve the effect of the facility, but will also increase its dorm energy consumption and required time. The Dormitory Facilities have been disabled (time unknown) and are not removable (According to the latest global version 4.5)
Dorm Energy[ | ]
Dorm facility energy powers various facilities in the common area.
Increasing your dorm energy center level will increase the dorm energy limit.
Increasing the dorm renovation level will also increase the dorm energy limit.
Dorm energy regenerates every hour and the amount regenerated is related to the current dorm comfort level rating.
Dorm Name[ | ]
Please note that dorm names are limited to 8 or less characters, despite the default name, "St. Freya's Dormitory", being more than 8 characters.
Crafting Furniture[ | ]
Furniture blueprints will be unlocked when you obtain furniture for the first time. If you have the blueprints of a particular piece of furniture, you can assemble that furniture using materials.
Some furniture blueprints (Housewarming set, etc...) are already unlocked.
Some furniture can be obtained from the move in rewards in the dorm directory.
Some furniture can be obtained from in-game events.
Check out the Furniture Catalog here!
Playing in the Dorms[ | ]
Once you've acquired some cute little residents and crafted them some furniture, it's time to let them loose!

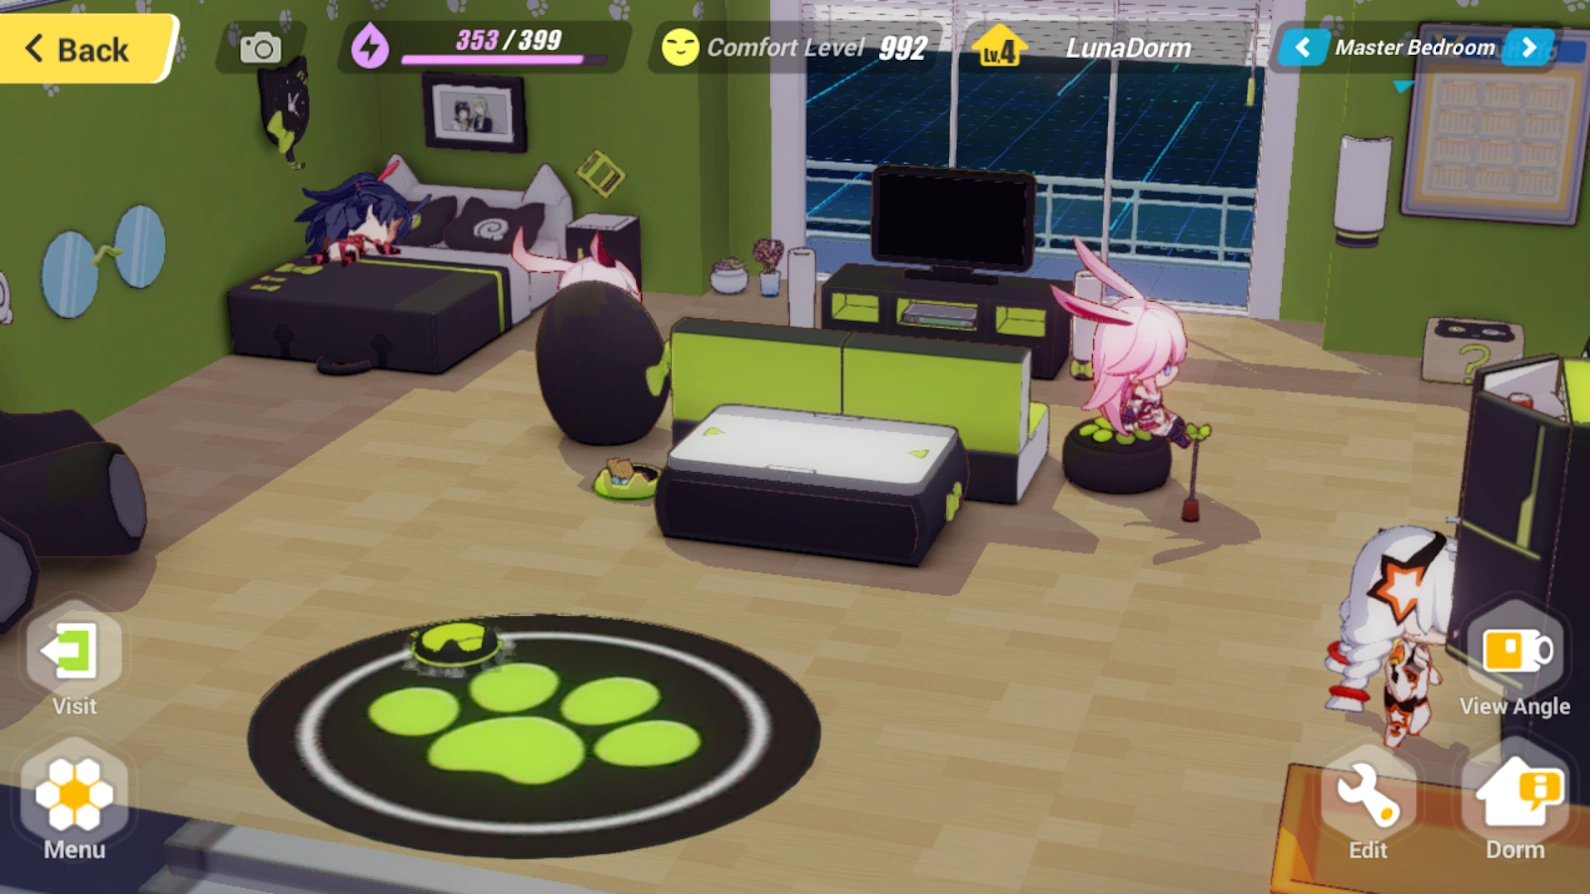
The main UI of the Dorms
Each dorm has 2 rooms to start, the Common Area and the Master Bedroom. Upon reaching Dorm Level 3, a third room, the Bedroom, will be added. Let's start with the UI. The top row has:
- Camera
- Dorm Energy
- Comfort Level
- Dorm Level
- Current room (with arrows to change rooms)
On the bottom left is:
- Visit (check out friend's dorms!)
- Menu
- Craft (furniture), Directory (Move in Missions), Info, Settings
- Craft (furniture), Directory (Move in Missions), Info, Settings
On the lower right:
- Edit (place and rearrange furniture)
- Dorm
- Change Dorm name, Dormitory Renovation, Moving in Configuration
Move In Procedure[ | ]
- Complete Move In Missions for the Valkyries or stigmata at the Directory to move them to the Dorms.
- Get the Valkyrie first to unlock her Move In Mission.
- Get at least 1 piece of the stigmata to unlock its Move In Missions.
- Some Move In Procedures are still under development. Please be patient!
Valkyries[ | ]
- Move In Procedure is automatically completed when entering Dorm for the first time after obtaining a new battlesuit.
- Before version 3.5, Move In Missions looked something like this:

| Move In Missions | |
|---|---|
| Achievement | Reward |
| Promotions (1/3) Raise Umbral Rose to Lv.20. |
x4 x10 |
| Promotions (2/3) Raise Umbral Rose to Lv.40. |
x4 x15 |
| Promotions (3/3) Raise Umbral Rose to Lv.60. |
x4 x20 |
| Growing Up (1/2) Raise Umbral Rose to S-rank. |
x6 x15 |
| Growing Up (2/2) Raise Umbral Rose to SS-rank. |
x7 x20 |
| Memories with Her (1/3) Gain 2-heart affection with Umbral Rose. |
x4 x10 |
| Memories with Her (2/3) Gain 3-heart affection with Umbral Rose. |
x4 x15 |
| Memories with Her (3/3) Gain 4-heart affection with Umbral Rose. |
x4 x20 |
| Xtreme Challenge (1/3) Use Umbral Rose to hit enemies 5 times with Charged ATK and clear any stage 9 times. |
x7 x10 |
| Xtreme Challenge (2/3) Use Umbral Rose to cast her ultimate 2 times and clear any stages 13 times. |
x7 x15 |
| Xtreme Challenge (3/3) Use Umbral Rose to perform 3 Ultimate Evasions and clear any stage 18 times. |
x7 x20 |
| Combat Blitz (1/3) Have Umbral Rose kill 35 Mechas. |
x7 x10 |
| Combat Blitz (2/3) Have Umbral Rose kill 50 Mechas. |
x7 x15 |
| Combat Blitz (3/3) Have Umbral Rose kill 70 Mechas. |
x7 x20 |
| Enemies within Memories (1/3) Use Umbral Rose to defeat C-rank or higher boss 4 times. |
x7 x10 |
| Enemies within Memories (2/3) Use Umbral Rose to defeat C-rank or higher boss 6 times. |
x7 x15 |
| Enemies within Memories (3/3) Use Umbral Rose to defeat B-rank or higher boss 8 times. |
x7 x20 |
| [Bonus] Weapon Appraiser (1/2) Get Obsidian Reaper. |
x7 x10 |
| [Bonus] Weapon Appraiser (2/2) Get Aphrodite. |
x13 x20 |
| [Bonus] Stigmata Collector (1/2) Get Elizabeth Bathory (B). |
x7 x10 |
| [Bonus] Stigmata Collector (2/2) Get Wilde (T). |
x13 x20 |
| Gift Recovery (1/4) Collect Rita's Tea Set x10. |
x5 x10 |
| Gift Recovery (2/4) Collect Rita's Tea Set x14. |
x5 x15 |
| Gift Recovery (3/4) Collect Rita's Tea Set x20. |
x5 x20 |
| Gift Recovery (4/4) Collect Rita's Tea Set x20. |
x5 x20 |
| Afternoon Tea Party (1/8) Collect and turn in 5 Tasty Desserts. |
x5 x10 |
| Afternoon Tea Party (2/8) Collect and turn in 5 Tasty Desserts. |
x5 x10 |
| Afternoon Tea Party (3/8) Collect and turn in 7 Tasty Desserts. |
x5 x15 |
| Afternoon Tea Party (4/8) Collect and turn in 7 Tasty Desserts. |
x5 x15 |
| Afternoon Tea Party (5/8) Collect and turn in 10 Tasty Desserts. |
x5 x20 |
| Afternoon Tea Party (6/8) Collect and turn in 10 Tasty Desserts. |
x5 x20 |
| Afternoon Tea Party (7/8) Collect and turn in 10 Tasty Desserts. |
x5 x20 |
| Afternoon Tea Party (8/8) Collect and turn in 10 Tasty Desserts. |
x5 x20 |
| Moving in Procedure Reward |
|---|
| 30: ⨯5 ⨯5  ⨯1 |
Interacting[ | ]
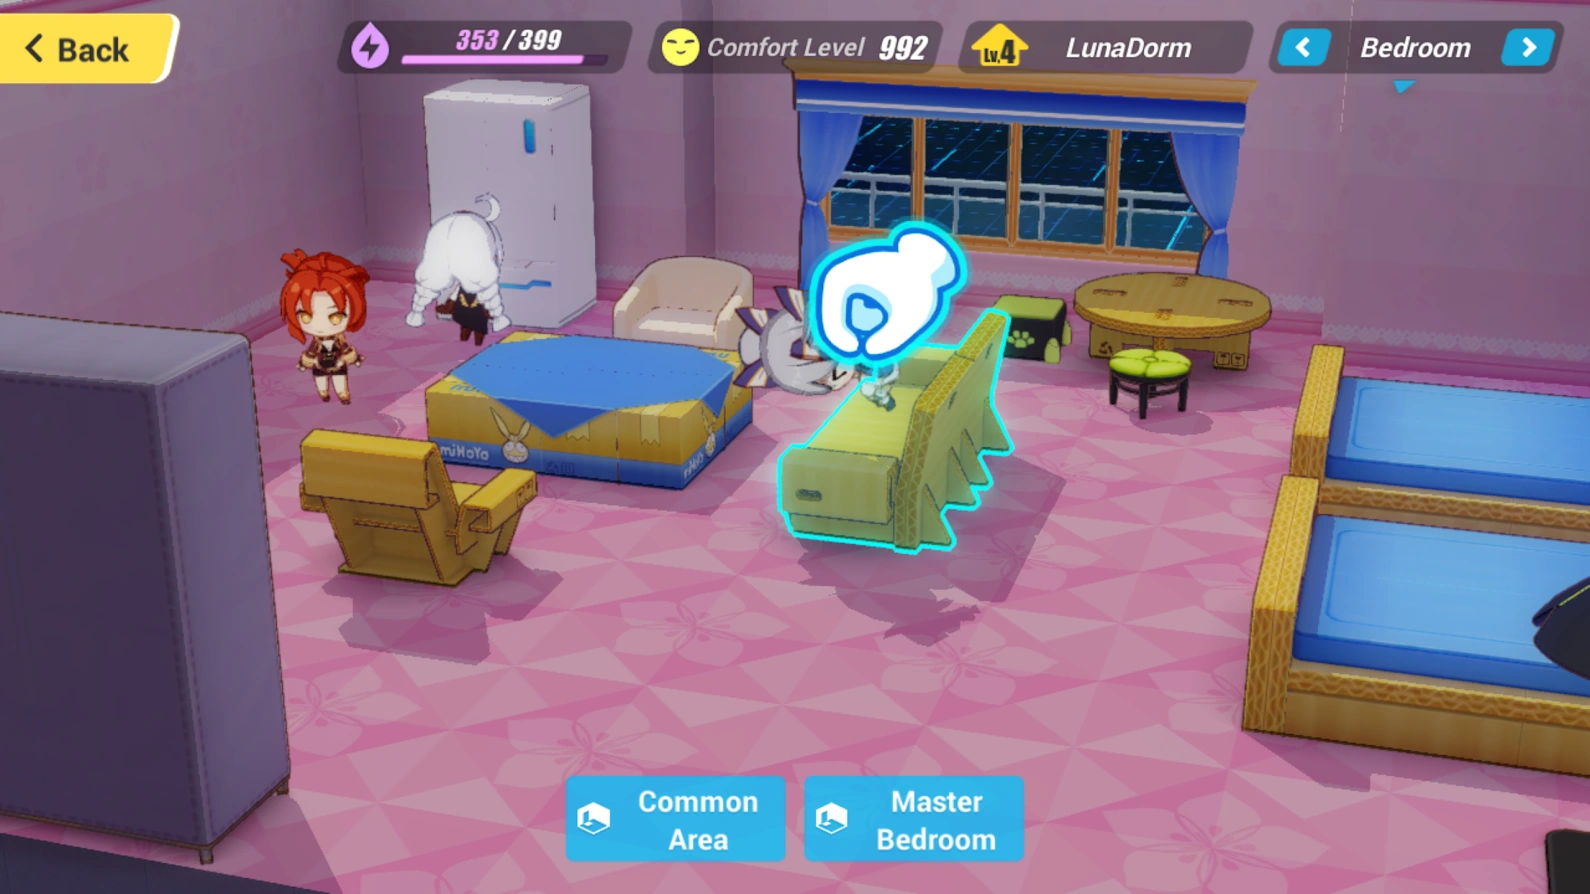
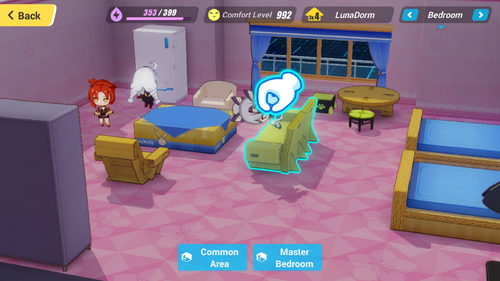
Chibi Snowy Sniper being moved to the Carton Sofa
Once you've set up your dorm, you can watch the chibi Valkyries and Stigmata interact with each other and the dorm furniture, or you can pick what they should do.
Certain interactions in the dorms will trigger a Dorm Interaction! These are visual novel type scenes where one or two Valkyries will let you know a little more about their likes and personalities. Some of these interactions require Valkyries to be in specific places. This can happen naturally, but you also have the ability to pick up and move chibis by long pressing on them and dragging them to the furniture or location you'd like to place them. For furniture specifically, the piece of furniture and the hand icon will have a blue outline to indicate where the chibi will go.
Be sure to experiment with different combinations of Valkyries in different places!
So Emotional![ | ]
Some actions in the normal game will affect your Valkyrie's well-being in the Dorms. Be sure to take care of their needs!
| In a Sad Daze after too much playing? Repeated taps should get their attention! | |
| Fighting is tough. Let them rest on a chair or bed if they're Tired, or tuck them into bed if they're Sleepy. | |
| Abyss can make a girl Hungry, let her get a snack from the fridge. | |
| Already proven you're the best? Prove it again with some Game Time at the arcade, TV, or PC! | |
| Spending time with Mei leads to... spending more time with Mei. Just standing next to her should do the trick. | |
| The key to getting stronger is to study, study, study. Read some books at the magazine rack or bookshelf. | |
| Did you just get a great Supply pull? She's so excited! Tap her and Talk about it! | |
| Sometimes Valkyries are just happy to see you! Greet her with a smile! |